Building and Using a Custom Nerves System
Nerves provides a way to combine your Elixir project code with everything else that’s needed to build firmware for embedded devices. Let’s see how to customize one of the provided systems and use it in a firmware build.
This worked as of mid-October 2016, but Nerves is still under development and things may change. Check the official documentation if things don’t seem to be working:
https://hexdocs.pm/nerves/systems.html
Pick a System
First, decide which of the existing systems you want to customize. In my case, this will be the one for the Raspberry Pi 2, which lives here:
https://github.com/nerves-project/nerves_system_rpi2
I’ve forked that project and will be using my fork in the rest of the article. This step is not absolutely required unless you want to be able to commit your changes, and it can be done later if you change your mind, so feel free to skip it and just use the repo linked above.
It’s also possible to create a system from scratch, which you may need to do if you’re porting Nerves to new hardware, but that is far beyond the scope of this article.
Get Linux
Because they’re based on Buildroot, Nerves Systems currently have to be built in Linux. Since I’m on OS X, I’m using Docker to create a container with Ubuntu that I can use for this part.
If you already have access to a remote Linux host, that will work, and if you’re using Linux as your development machine, then you probably already know this stuff. :)
$ docker run -it ubuntu /bin/bash
# apt-get update
# apt-get install git g++ libssl-dev libncurses5-dev bc m4 make unzip cmake
# apt-get install wget cpio python bzip2
# exit
The first apt-get line is from the Nerves docs. The second is for things that were assumed to be present in a standard Ubuntu install, but were not included in the Docker image.
Now you have a container with all the necessary stuff installed. This would be a good time to save your work.
$ docker ps -a
... copy the id
$ docker commit [the_id] nerves_basic
This may take a while. When it finishes, you can run docker images to check that the image is there.
Build an Existing System
To check that everything works, let’s build the un-modified nerves_system_rpi2 system. Start a container using your new image, and expose a directory for the output:
$ docker run -it -v ~/docker_stuff:/tmp/output nerves_basic /bin/bash
$ git clone https://github.com/nerves-project/nerves_system_br
$ git clone https://github.com/wsmoak/nerves_system_rpi2
# ./nerves_system_br/create-build.sh nerves_system_rpi2/nerves_defconfig rpi2_out
# cd rpi2_out
# make
... run `make help` to see other options, such as:
# make system
# cp nerves_system_rpi2.tar.gz /tmp/output/
# exit
This maps docker_stuff in my home directory to /tmp/output inside the container. When the file is copied, it should show up in ~/docker_stuff.
This is another good time to save your work in the container as a new image, so that you can start over from here.
docker ps -a
... copy the container id
docker commit [container id] nerves_after_build
Every time you ‘docker run’ it creates a new container based on the specified image. Next time, we’ll start and attach to the container.
Note: I tried to use the docker volume as the output directory to avoid having to copy and expand the .tar.gz file, but I ran into a permissions error. https://gist.github.com/wsmoak/660583ccb387b3ef609af6facc61aa02
Set Up Build Machine
In order to use the newly built system, we’ll need to expand the .tar.gz file. Remember it was copied to a Docker volume at ~/docker_stuff, so check that it’s there, and then:
$ cd /tmp
$ tar -xzvf ~/docker_stuff/nerves_system_rpi2.tar.gz
Now there should be a nerves_system_rpi2 directory under /tmp with the contents of the .tar.gz file.
Next, set the NERVES_SYSTEM environment variable to this path so that you override Nerves’ default behavior of fetching the ‘official’ system.
$ export NERVES_SYSTEM=/tmp/nerves_system_rpi2And since we’re building for the Raspberry Pi 2, let’s also set NERVES_TARGET which is used in the mix.exs of Nerves projects:
$ export NERVES_TARGET=rpi2Build Firmware
Presumably the reason you wanted a custom system is that you need it to build firmware for your own project. If you don’t have a project, you can use one of the Nerves example projects like blinky or hello_wifi.
Let’s use the hello_wifi project in the nerves-examples repo.
$ git clone https://github.com/nerves-project/nerves-examples
$ cd nerves-examples/hello_wifi
... edit config/config.exs if you'd like to insert your ssid and password.
$ mix deps.get
$ mix firmware
Hopefully that completes with no errors! You should see it download the toolchain, but not the system, since it’s using the local one you built.
You can go ahead and mix firmware.burn if you’d like to try it on your device.
Modify a System
Now let’s return to the Docker image and use Buildroot to make a modification to the existing RPi2 system.
$ docker ps -a
... find the one using the nerves_basic image and copy the container id (or the name)
$ docker start [container id or name]
$ docker attach [container id or name]
... press enter to get a prompt
# cd rpi2_out
# make menuconfig
Note: since you must type make menuconfig in the output directory, it seems that you must have built the system once before trying to modify it? That doesn’t make sense if you’re creating one from scratch. So probably it’s just because of the relative directory that it uses to copy the nerves-defconfig.
This will pop up the blue-and-gray Buildroot Configuration menu.
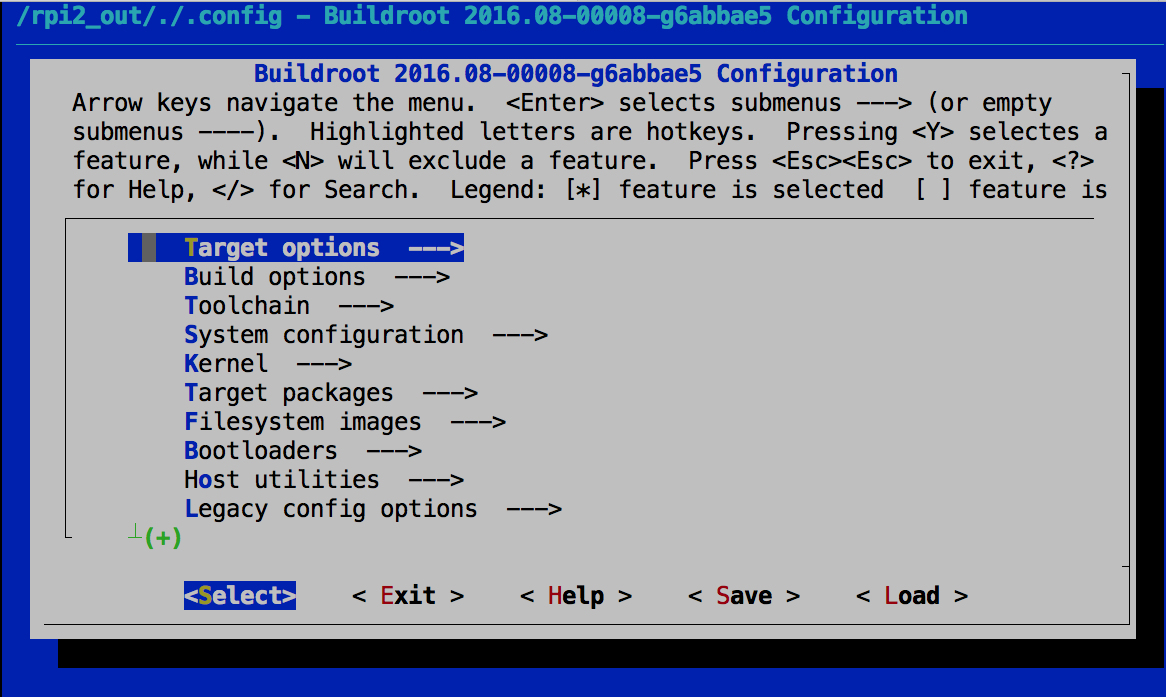
Use / to search for something… how about the driver for the rtl8188eu wifi adapter?
and now we know that it can be found under Target Packages -> Hardware Handling -> rtl8188eu
Navigate the menus to find it, and press space to enable that option.
Then arrow over to Save, and confirm to save the .config file.
Exit out of the Buildroot Config dialog, and back at the prompt:
# make savedefconfigThis will update the nerves_defconfig over in nerves_system_rpi2 by way of a relative directory path.
# cd ../nerves_system_rpi2
# git diff
diff --git a/nerves_defconfig b/nerves_defconfig
index 9c01b43..6c76080 100644
--- a/nerves_defconfig
+++ b/nerves_defconfig
@@ -52,6 +52,7 @@ BR2_PACKAGE_LINUX_FIRMWARE_RTL_87XX=y
BR2_PACKAGE_RPI_FIRMWARE=y
BR2_PACKAGE_RPI_FIRMWARE_X=y
BR2_PACKAGE_RPI_USERLAND=y
+BR2_PACKAGE_RTL8188EU=y
BR2_PACKAGE_ERLANG_SMP=y
BR2_PACKAGE_LIBMNL=y
BR2_PACKAGE_NCURSES=yAnd this is why I checked out my fork of nerves_system_rpi2 earlier – so that I can commit that change:
# git checkout -b with_8188
# git add .
# git commit -m "Add support for rtl8188eu"
Which you can see here: https://github.com/wsmoak/nerves_system_rpi2/commit/20027bc44cc0a20fb5540fce54962868700a097f
Build Modified System
Now that we have modified the system, let’s build it again:
# cd ..
# ./nerves_system_br/create-build.sh nerves_system_rpi2/nerves_defconfig rpi2_out
# cd rpi2_out
# make
# make system
# cp nerves_system_rpi2.tar.gz /tmp/output
# exit
Build Firmware
Remove the directory where you expanded the unmodified custom system, and expand the modified one:
$ cd /tmp
$ rm -rf /tmp/nerves_system_rpi2
$ tar -xzvf ~/docker_stuff/nerves_system_rpi2.tar.gz
Ideally the modified system would have a different name, or at least a different version number. It’s a really bad idea to build the same artifact name and version number with different contents. You should be able to look at the filename and tell what it contains.
Remember to set the NERVES_SYSTEM environment variable as above, or Nerves will fetch and use the released version of the system rather than your locally built one. And set NERVES_TARGET also if needed.
$ cd /path/to/nerves-examples/hello_wifi
$ mix deps.get
$ mix firmware
Then, optionally, mix firmware.burn if you want to burn a micro SD card to try it in your device.
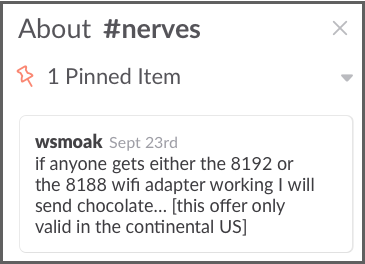
Unfortunately, enabling the rtl8188eu driver was not enough to get my wifi adapter to work. I hear that the 8188 and 8192 are problematic on the latest Linux kernel. Which is just super because I have two of each!
So, this offer remains open!
Troubleshooting
If things aren’t working, try deleting the _build and/or rel/hello_wifi directories under the hello_wifi project.
Summary
We’ve seen how to use Buildroot to modify a Nerves system, and how to use that custom system when building firmware.
Copyright 2016 Wendy Smoak - This post first appeared on http://wsmoak.github.io and is CC BY-NC licensed.
References
- https://hexdocs.pm/nerves/systems.html#creating-or-modifying-a-nerves-system-with-buildroot
- https://rominirani.com/docker-tutorial-series-part-5-building-your-own-docker-images-b4a448b44afc#.mpag2oewy
- http://wiki.wsmoak.net/cgi-bin/wiki.pl?Docker
- https://docker.github.io/engine/reference/commandline/images/
- https://www.liquidweb.com/kb/how-to-commit-changes-to-docker/
- https://www.liquidweb.com/kb/how-to-list-and-attach-to-docker-containers/